Furze: Difference between revisions
No edit summary |
(→List of Crafting Recipes: Changing title, adding "produces" column.) |
||
| Line 18: | Line 18: | ||
Above is an example of a crafting recipe. The leftmost side contains the name, and icon of the item the blueprint will create. At the center is the blueprints parts, items required, and what [[nature]] likes the item. "Add Parts" is currently a non-functional feature. The rightmost side has the copper{{c}} fee and a menu to select how many of the item to craft. See below for a list of all crafting recipes. | Above is an example of a crafting recipe. The leftmost side contains the name, and icon of the item the blueprint will create. At the center is the blueprints parts, items required, and what [[nature]] likes the item. "Add Parts" is currently a non-functional feature. The rightmost side has the copper{{c}} fee and a menu to select how many of the item to craft. See below for a list of all crafting recipes. | ||
=== List of | === List of Blueprints === | ||
{| class="wikitable sortable" | {| class="wikitable sortable" | ||
! Blueprint !!class="unsortable"| Parts !!class="unsortable"| Items Required !! Copper Cost | ! Blueprint !!class="unsortable"| Parts !!class="unsortable"| Items Required !! Copper Cost !! Produces | ||
|- | |- | ||
|{{i|Abyssal Incense}}||30 {{i|Lotus}}</br>40 {{i|Sakura}}||N/A||10,000{{c}} | |{{i|Abyssal Incense Blueprint}}||30 {{i|Lotus}}</br>40 {{i|Sakura}}||N/A||10,000{{c}}||{{i|Abyssal Incense}} | ||
|- | |- | ||
|{{i|Barrel}}||6 {{i|Dark Hardwood}}</br>4 {{i|Iron Bar}}||N/A||1,500{{c}} | |{{i|Barrel Blueprint}}||6 {{i|Dark Hardwood}}</br>4 {{i|Iron Bar}}||N/A||1,500{{c}}||{{i|Barrel}} | ||
|- | |- | ||
|{{i|Black Decorative Fence}}||12 {{i|Stored Spring Water}}</br>12 {{i|Embers}}</br>9 {{i|Steel Bar}}</br>6 {{i|Tallow}}||N/A||1,500{{c}} | |{{i|Black Decorative Fence Blueprint}}||12 {{i|Stored Spring Water}}</br>12 {{i|Embers}}</br>9 {{i|Steel Bar}}</br>6 {{i|Tallow}}||N/A||1,500{{c}}||{{i|Black Decorative Fence}} | ||
|- | |- | ||
|{{i|Black Dye}}||1 {{i|Glass Jar}}</br>8 {{i|Ink Sac}}||N/A||100{{c}} | |{{i|Black Dye Blueprint}}||1 {{i|Glass Jar}}</br>8 {{i|Ink Sac}}||N/A||100{{c}}||{{i|Black Dye}} | ||
|- | |- | ||
|{{i|Black Long Decorative Fence}}||12 {{i|Stored Spring Water}}</br>12 {{i|Embers}}</br>9 {{i|Steel Bar}}</br>6 {{i|Tallow}}||N/A||1,500{{c}} | |{{i|Black Long Decorative Fence Blueprint}}||12 {{i|Stored Spring Water}}</br>12 {{i|Embers}}</br>9 {{i|Steel Bar}}</br>6 {{i|Tallow}}||N/A||1,500{{c}}||{{i|Black Long Decorative Fence}} | ||
|- | |- | ||
|{{i|Blue Cushion}}||2 {{i|Blue Cotton Fabric}}</br>6 {{i|Cotton}}</br>1 {{i|Clay}}||N/A||1,500{{c}} | |{{i|Blue Cushion Blueprint}}||2 {{i|Blue Cotton Fabric}}</br>6 {{i|Cotton}}</br>1 {{i|Clay}}||N/A||1,500{{c}}||{{i|Blue Cushion}} | ||
|- | |- | ||
|{{i|Blue Dye}}||1 {{i|Glass Jar}}</br>2 {{i|Lapis Lazuli}}||N/A||100{{c}} | |{{i|Blue Dye Blueprint}}||1 {{i|Glass Jar}}</br>2 {{i|Lapis Lazuli}}||N/A||100{{c}}||{{i|Blue Dye}} | ||
|- | |- | ||
|{{i|Broken Lantern}}||1 {{i|Unlit Lantern}}||N/A||500{{c}} | |{{i|Broken Lantern Blueprint}}||1 {{i|Unlit Lantern}}||N/A||500{{c}}||{{i|Broken Lantern}} | ||
|- | |- | ||
|{{i|Brown Dye}}||1 {{i|Glass Jar}}</br>4 {{i|Cacao}}||N/A||100{{c}} | |{{i|Brown Dye Blueprint}}||1 {{i|Glass Jar}}</br>4 {{i|Cacao}}||N/A||100{{c}}||{{i|Brown Dye}} | ||
|- | |- | ||
|{{i|Bunch Of Barrels}}||4 {{i|Barrel}}||N/A||175{{c}} | |{{i|Bunch Of Barrels Blueprint}}||4 {{i|Barrel}}||N/A||175{{c}}||{{i|Bunch Of Barrels}} | ||
|- | |- | ||
|{{i|Cardinal Pattern Agate}}||1 {{i|Harkestone}}</br>24 {{i|Blackbird}}</br>12 {{i|Soft Feathers}}</br>3 {{i|Glue}}</br>1 {{i|Gold Bar}}||N/A||20,000{{c}} | |{{i|Cardinal Pattern Agate Blueprint}}||1 {{i|Harkestone}}</br>24 {{i|Blackbird}}</br>12 {{i|Soft Feathers}}</br>3 {{i|Glue}}</br>1 {{i|Gold Bar}}||N/A||20,000{{c}}||{{i|Cardinal Pattern Agate}} | ||
|- | |- | ||
|{{i|Cast Iron Pan}}||3 {{i|Iron Bar}}</br>1 {{i|Tallow}}||1 {{i|Embers}}||15{{c}} | |{{i|Cast Iron Pan Blueprint}}||3 {{i|Iron Bar}}</br>1 {{i|Tallow}}||1 {{i|Embers}}||15{{c}}||{{i|Cast Iron Pan}} | ||
|- | |- | ||
|{{i|Charcoal}}|| | |{{i|Charcoal Blueprint}}||6 {{i|Tree Bark}}||1 {{i|Embers}}||15{{c}}||{{i|Charcoal}} | ||
|- | |- | ||
|{{i|Cheeks Accent Quartz}}||2 {{i|Harkestone Fragment}}</br>3 {{i|Precious Stones}}</br>3 {{i|Glaze}}||N/A||2,500{{c}} | |{{i|Cheeks Accent Quartz Blueprint}}||2 {{i|Harkestone Fragment}}</br>3 {{i|Precious Stones}}</br>3 {{i|Glaze}}||N/A||2,500{{c}}||{{i|Cheeks Accent Quartz}} | ||
|- | |- | ||
|{{i|Lit Lantern}}||1 {{i|Unlit Lantern}}</br>1 {{i|Embers}}||N/A||500{{c}} | |{{i|Lit Lantern Blueprint}}||1 {{i|Unlit Lantern}}</br>1 {{i|Embers}}||N/A||500{{c}}||{{i|Lit Lantern}} | ||
|- | |- | ||
|{{i|Cogwheel Incense}}||30 {{i|Saffron}}</br>30 {{i|Turmeric}}||N/A||10,000{{c}} | |{{i|Cogwheel Incense Blueprint}}||30 {{i|Saffron}}</br>30 {{i|Turmeric}}||N/A||10,000{{c}}||{{i|Cogwheel Incense}} | ||
|- | |- | ||
|{{i|Copper Bar}}||5 {{i|Copper Ore}}||1 {{i|Embers}}||35{{c}} | |{{i|Copper Bar Blueprint}}||5 {{i|Copper Ore}}||1 {{i|Embers}}||35{{c}}||{{i|Copper Bar}} | ||
|- | |- | ||
|{{i|Copper Candlestick}}||1 {{i|Copper Bar}}</br>3 {{i|Bees Wax}}</br>1 {{i|Embers}}</br>1 {{i|Twine}}||1 {{i|Embers}}||1,500{{c}} | |{{i|Copper Candlestick Blueprint}}||1 {{i|Copper Bar}}</br>3 {{i|Bees Wax}}</br>1 {{i|Embers}}</br>1 {{i|Twine}}||1 {{i|Embers}}||1,500{{c}}||{{i|Copper Candlestick}} | ||
|- | |- | ||
|{{i|Crate}}||6 {{i|Light Hardwood}}</br>9 {{i|Nail}}||N/A||1,500{{c}} | |{{i|Crate Blueprint}}||6 {{i|Light Hardwood}}</br>9 {{i|Nail}}||N/A||1,500{{c}}||{{i|Crate}} | ||
|- | |- | ||
|{{i|Daisy Patch}}||6 {{i|Daisy}}||N/A||1,500{{c}} | |{{i|Daisy Patch Blueprint}}||6 {{i|Daisy}}||N/A||1,500{{c}}||{{i|Daisy Patch}} | ||
|- | |- | ||
|{{i|Duo Eye Prism}}||1 {{i|Harkestone}}</br>6 {{i|Precious Stones}}</br>2 {{i|Platinum Nugget}}</br>2 {{i|Gold Nugget}}</br>2 {{i|Glass}}||N/A||10,000{{c}} | |{{i|Duo Eye Prism Blueprint}}||1 {{i|Harkestone}}</br>6 {{i|Precious Stones}}</br>2 {{i|Platinum Nugget}}</br>2 {{i|Gold Nugget}}</br>2 {{i|Glass}}||N/A||10,000{{c}}||{{i|Duo Eye Prism}} | ||
|- | |- | ||
|{{i|Firefly Spark}}||120 {{i|Firefly}}||N/A||2,250{{c}} | |{{i|Firefly Spark Blueprint}}||120 {{i|Firefly}}||N/A||2,250{{c}}||{{t|Firefly Spark}} | ||
|- | |- | ||
|{{i|Fish Pile}}||1 {{i|Sardine}}</br>5 {{i|Bluefin Tuna}}||N/A||1,500{{c}} | |{{i|Fish Pile Blueprint}}||1 {{i|Sardine}}</br>5 {{i|Bluefin Tuna}}||N/A||1,500{{c}}||{{i|Fish Pile}} | ||
|- | |- | ||
|{{i|Glaze}}||3 {{i|Sand}}</br>2 {{i|Iron Ore}}||1 {{i|Embers}}||15{{c}} | |{{i|Glaze Blueprint}}||3 {{i|Sand}}</br>2 {{i|Iron Ore}}||1 {{i|Embers}}||15{{c}}||{{i|Glaze}} | ||
|- | |- | ||
|{{i|Glue}}||6 {{i|Bone}}</br>1 {{i|Stored Spring Water}}||1 {{i|Embers}}||15{{c}} | |{{i|Glue Blueprint}}||6 {{i|Bone}}</br>1 {{i|Stored Spring Water}}||1 {{i|Embers}}||15{{c}}||{{i|Glue}} | ||
|- | |- | ||
|{{i|Gold Bar}}||6 {{i|Gold Nugget}}||1 {{i|Embers}}||50{{c}} | |{{i|Gold Bar Blueprint}}||6 {{i|Gold Nugget}}||1 {{i|Embers}}||50{{c}}||{{i|Gold Bar}} | ||
|- | |- | ||
|{{i|Silver Candlestick}}||3 {{i|Silver Bar}}</br>3 {{i|Bees Wax}}</br>1 {{i|Embers}}</br>1 {{i|Twine}}</br>1 {{i|Embers}}||1 {{i|Embers}}||1,500{{c}} | |{{i|Silver Candlestick Blueprint}}||3 {{i|Silver Bar}}</br>3 {{i|Bees Wax}}</br>1 {{i|Embers}}</br>1 {{i|Twine}}</br>1 {{i|Embers}}||1 {{i|Embers}}||1,500{{c}}||{{i|Silver Candlestick}} | ||
|- | |- | ||
|{{i|Green Cushion}}||1 {{i|Green Cotton Fabric}}</br>3 {{i|Cotton}}</br>1 {{i|Clay}}||N/A||1,500{{c}} | |{{i|Green Cushion Blueprint}}||1 {{i|Green Cotton Fabric}}</br>3 {{i|Cotton}}</br>1 {{i|Clay}}||N/A||1,500{{c}}||{{i|Green Cushion}} | ||
|- | |- | ||
|{{i|Green Dye}}||1 {{i|Glass Jar}}</br>3 {{i|Spinach}}||N/A||100{{c}} | |{{i|Green Dye Blueprint}}||1 {{i|Glass Jar}}</br>3 {{i|Spinach}}||N/A||100{{c}}||{{i|Green Dye}} | ||
|- | |- | ||
|{{i|Grey Dye}}||1 {{i|Glass Jar}}</br>3 {{i|Charcoal}}||N/A||100{{c}} | |{{i|Grey Dye Blueprint}}||1 {{i|Glass Jar}}</br>3 {{i|Charcoal}}||N/A||100{{c}}||{{i|Grey Dye}} | ||
|- | |- | ||
|{{i|Harkestone}}||3 {{i|Harkestone Fragment}}||1 {{i|Embers}}||100{{c}} | |{{i|Harkestone Blueprint}}||3 {{i|Harkestone Fragment}}||1 {{i|Embers}}||100{{c}}||{{i|Harkestone}} | ||
|- | |- | ||
|{{i|Harvest Incense}}||30 {{i|Basil}}</br>30 {{i|Oregano}}||N/A||10,000{{c}} | |{{i|Harvest Incense Blueprint}}||30 {{i|Basil}}</br>30 {{i|Oregano}}||N/A||10,000{{c}}||{{i|Harvest Incense}} | ||
|- | |- | ||
|{{i|Hatemail}}||3 {{i|Paper}}</br>1 {{i|Harkestone}}</br>1 {{i|Ink}}</br>1 {{i|Bees Wax}}</br>1 {{i|Stardust}}</br>1 {{i|Black Rose}}||N/A||10,000{{c}} | |{{i|Hatemail Blueprint}}||3 {{i|Paper}}</br>1 {{i|Harkestone}}</br>1 {{i|Ink}}</br>1 {{i|Bees Wax}}</br>1 {{i|Stardust}}</br>1 {{i|Black Rose}}||N/A||10,000{{c}}||{{i|Hatemail}} | ||
|- | |- | ||
|{{i|Hay}}||3 {{i|Fibrous Plant}}</br>||N/A||5{{c}} | |{{i|Hay Blueprint}}||3 {{i|Fibrous Plant}}</br>||N/A||5{{c}}||{{i|Hay}} | ||
|- | |- | ||
|{{i|Ink}}||3 {{i|Ink Sac}}</br>1 {{i|Glass Jar}}||N/A||15{{c}} | |{{i|Ink Blueprint}}||3 {{i|Ink Sac}}</br>1 {{i|Glass Jar}}||N/A||15{{c}}||{{i|Ink}} | ||
|- | |- | ||
|{{i|Iron Bar}}||5 {{i|Iron Ore}}||1 {{i|Embers}}||25{{c}} | |{{i|Iron Bar Blueprint}}||5 {{i|Iron Ore}}||1 {{i|Embers}}||25{{c}}||{{i|Iron Bar}} | ||
|- | |- | ||
|{{i|Leather}}||1 {{i|Hide}}</br>1 {{i|Tallow}}||N/A||15{{c}} | |{{i|Leather Blueprint}}||1 {{i|Hide}}</br>1 {{i|Tallow}}||N/A||15{{c}}||{{i|Leather}} | ||
|- | |- | ||
|{{i|Leopard Pattern Agate}}||2 {{i|Harkestone}}</br>60 {{i|Sand}}</br>12 {{i|Ink}}</br>3 {{i|Gold Bar}}</br>1 {{i|Platinum Bar}}</br>1 {{i|Pebbles}}||N/A||25,000{{c}} | |{{i|Leopard Pattern Agate Blueprint}}||2 {{i|Harkestone}}</br>60 {{i|Sand}}</br>12 {{i|Ink}}</br>3 {{i|Gold Bar}}</br>1 {{i|Platinum Bar}}</br>1 {{i|Pebbles}}||N/A||25,000{{c}}||{{i|Leopard Pattern Agate}} | ||
|- | |- | ||
|{{i|Gold Candlestick}}||1 {{i|Gold Bar}}</br>3 {{i|Bees Wax}}</br>1 {{i|Embers}}</br>1 {{i|Twine}}||1 {{i|Embers}}||2,500{{c}} | |{{i|Gold Candlestick Blueprint}}||1 {{i|Gold Bar}}</br>3 {{i|Bees Wax}}</br>1 {{i|Embers}}</br>1 {{i|Twine}}||1 {{i|Embers}}||2,500{{c}}||{{i|Gold Candlestick}} | ||
|- | |- | ||
|{{i|Lollipop Accent Quartz}}||2 {{i|Harkestone Fragment}}</br>20 {{i|Strawberry}}</br>20 {{i|Lunarberry}}</br>20 {{i|Brambleberry}}</br>6 {{i|Sugar}}</br>3 {{i|Stardust}}||N/A||5,500{{c}} | |{{i|Lollipop Accent Quartz Blueprint}}||2 {{i|Harkestone Fragment}}</br>20 {{i|Strawberry}}</br>20 {{i|Lunarberry}}</br>20 {{i|Brambleberry}}</br>6 {{i|Sugar}}</br>3 {{i|Stardust}}||N/A||5,500{{c}}||{{i|Lollipop Accent Quartz}} | ||
|- | |- | ||
|{{i|Loveletter}}||3 {{i|Paper}}</br>1 {{i|Harkestone}}</br>1 {{i|Ink}}</br>1 {{i|Bees Wax}}</br>1 {{i|Stardust}}</br>1 {{i|Red Rose}}||N/A||10,000{{c}} | |{{i|Loveletter Blueprint}}||3 {{i|Paper}}</br>1 {{i|Harkestone}}</br>1 {{i|Ink}}</br>1 {{i|Bees Wax}}</br>1 {{i|Stardust}}</br>1 {{i|Red Rose}}||N/A||10,000{{c}}||{{i|Loveletter}} | ||
|- | |- | ||
|{{i|Lovestruck Lens}}||1 {{i|Harkestone Fragment}}</br>1 {{i|Loveletter}}</br>2 {{i|Glass}}</br>1 {{i|Copper Bar}}</br>1 {{i|Platinum Bar}}||N/A||9,000{{c}} | |{{i|Lovestruck Lens Blueprint}}||1 {{i|Harkestone Fragment}}</br>1 {{i|Loveletter}}</br>2 {{i|Glass}}</br>1 {{i|Copper Bar}}</br>1 {{i|Platinum Bar}}||N/A||9,000{{c}}||{{i|Lovestruck Lens}} | ||
|- | |- | ||
|{{i|Luna Incense}}||30 {{i|Lavender}}</br>30 {{i|Jasmine}}||N/A||10,000{{c}} | |{{i|Luna Incense Blueprint}}||30 {{i|Lavender}}</br>30 {{i|Jasmine}}||N/A||10,000{{c}}||{{i|Luna Incense}} | ||
|- | |- | ||
|{{i|Market Stall}}||12 {{i|Twine}}</br>12 {{i|Nail}}</br>12 {{i|Light Hardwood}}</br>5 {{i|White Cotton Fabric}}</br>5 {{i|Red Cotton Fabric}}</br>3 {{i|Copper Bar}}</br>3 {{i|Dark Hardwood}}</br>3 {{i|Tallow}}||N/A||3,000{{c}} | |{{i|Market Stall Blueprint}}||12 {{i|Twine}}</br>12 {{i|Nail}}</br>12 {{i|Light Hardwood}}</br>5 {{i|White Cotton Fabric}}</br>5 {{i|Red Cotton Fabric}}</br>3 {{i|Copper Bar}}</br>3 {{i|Dark Hardwood}}</br>3 {{i|Tallow}}||N/A||3,000{{c}}||{{i|Market Stall}} | ||
|- | |- | ||
|{{i|Metal Bucket}}||3 {{i|Steel Bar}}||N/A||1,500{{c}} | |{{i|Metal Bucket Blueprint}}||3 {{i|Steel Bar}}||N/A||1,500{{c}}||{{i|Metal Bucket}} | ||
|- | |- | ||
|{{i|Metropolis Incense}}||30 {{i|Patchouli}}</br>40 {{i|Olibanum}}||N/A||10,000{{c}} | |{{i|Metropolis Incense Blueprint}}||30 {{i|Patchouli}}</br>40 {{i|Olibanum}}||N/A||10,000{{c}}||{{i|Metropolis Incense}} | ||
|- | |- | ||
|{{i|Mysthrum}}||1 {{i|Harkestone}}</br>2 {{i|Precious Stones}}</br>6 {{i|Stardust}}||N/A||10,000{{c}} | |{{i|Mysthrum Blueprint}}||1 {{i|Harkestone}}</br>2 {{i|Precious Stones}}</br>6 {{i|Stardust}}||N/A||10,000{{c}}||{{i|Mysthrum}} | ||
|- | |- | ||
|{{i|Nail}}||3 {{i|Iron Ore}}||1 {{i|Embers}}||15{{c}} | |{{i|Nail Blueprint}}||3 {{i|Iron Ore}}||1 {{i|Embers}}||15{{c}}||{{i|Nail}} | ||
|- | |- | ||
|{{i|Needle}}||1 {{i|Iron Ore}}</br>||1 {{i|Embers}}||15{{c}} | |{{i|Needle Blueprint}}||1 {{i|Iron Ore}}</br>||1 {{i|Embers}}||15{{c}}||{{i|Needle}} | ||
|- | |- | ||
|{{i|Orange Dye}}||1 {{i|Glass Jar}}</br>30 {{i|Clay}}||N/A||100{{c}} | |{{i|Orange Dye Blueprint}}||1 {{i|Glass Jar}}</br>30 {{i|Clay}}||N/A||100{{c}}||{{i|Orange Dye}} | ||
|- | |- | ||
|{{i|Overgrowth Ivy Accent Quartz}}||2 {{i|Harkestone}}</br>60 {{i|Leaves}}</br>40 {{i|Emerald Shards}}</br>20 {{i|Moss}}||N/A||45,000{{c}} | |{{i|Overgrowth Ivy Accent Quartz Blueprint}}||2 {{i|Harkestone}}</br>60 {{i|Leaves}}</br>40 {{i|Emerald Shards}}</br>20 {{i|Moss}}||N/A||45,000{{c}}||{{i|Overgrowth Ivy Accent Quartz}} | ||
|- | |- | ||
|{{i|Paper}}||6 {{i|Tree Bark}}</br>3 {{i|Stored Spring Water}}||N/A||15{{c}} | |{{i|Paper Blueprint}}||6 {{i|Tree Bark}}</br>3 {{i|Stored Spring Water}}||N/A||15{{c}}||{{i|Paper}} | ||
|- | |- | ||
|{{i|Pile Of Rope}}||10 {{i|Twine}}</br>||N/A||1,500{{c}} | |{{i|Pile Of Rope Blueprint}}||10 {{i|Twine}}</br>||N/A||1,500{{c}}||{{i|Pile Of Rope}} | ||
|- | |- | ||
|{{i|Pink Dye}}||1 {{i|Glass Jar}}</br>24 {{i|Seashell}}||N/A||100{{c}} | |{{i|Pink Dye Blueprint}}||1 {{i|Glass Jar}}</br>24 {{i|Seashell}}||N/A||100{{c}}||{{i|Pink Dye}} | ||
|- | |- | ||
|{{i|Platinum Bar}}||6 {{i|Platinum Nugget}}||1 {{i|Embers}}||50{{c}} | |{{i|Platinum Bar Blueprint}}||6 {{i|Platinum Nugget}}||1 {{i|Embers}}||50{{c}}||{{i|Platinum Bar}} | ||
|- | |- | ||
|{{i|Porcelain Bowl}}||3 {{i|Clay}}</br>2 {{i|Sand}}</br>1 {{i|Glaze}}||1 {{i|Embers}}||15{{c}} | |{{i|Porcelain Bowl Blueprint}}||3 {{i|Clay}}</br>2 {{i|Sand}}</br>1 {{i|Glaze}}||1 {{i|Embers}}||15{{c}}||{{i|Porcelain Bowl}} | ||
|- | |- | ||
|{{i|Porcelain Mug}}||3 {{i|Clay}}</br>2 {{i|Sand}}</br>1 {{i|Glaze}}||1 {{i|Embers}}||15{{c}} | |{{i|Porcelain Mug Blueprint}}||3 {{i|Clay}}</br>2 {{i|Sand}}</br>1 {{i|Glaze}}||1 {{i|Embers}}||15{{c}}||{{i|Porcelain Mug}} | ||
|- | |- | ||
|{{i|Porcelain Plate}}||3 {{i|Clay}}</br>2 {{i|Sand}}</br>1 {{i|Glaze}}||1 {{i|Embers}}||15{{c}} | |{{i|Porcelain Plate Blueprint}}||3 {{i|Clay}}</br>2 {{i|Sand}}</br>1 {{i|Glaze}}||1 {{i|Embers}}||15{{c}}||{{i|Porcelain Plate}} | ||
|- | |- | ||
|{{i|Pot}}||3 {{i|Steel Bar}}||1 {{i|Embers}}||15{{c}} | |{{i|Pot Blueprint}}||3 {{i|Steel Bar}}||1 {{i|Embers}}||15{{c}}||{{i|Pot}} | ||
|- | |- | ||
|{{i|Purple Dye}}||1 {{i|Glass Jar}}</br>30 {{i|Murex Snail}}||N/A||100{{c}} | |{{i|Purple Dye Blueprint}}||1 {{i|Glass Jar}}</br>30 {{i|Murex Snail}}||N/A||100{{c}}||{{i|Purple Dye}} | ||
|- | |- | ||
|{{i|Red Cushion}}||1 {{i|Red Cotton Fabric}}</br>3 {{i|Cotton}}</br>1 {{i|Clay}}||N/A||1,500{{c}} | |{{i|Red Cushion Blueprint}}||1 {{i|Red Cotton Fabric}}</br>3 {{i|Cotton}}</br>1 {{i|Clay}}||N/A||1,500{{c}}||{{i|Red Cushion}} | ||
|- | |- | ||
|{{i|Red Dye}}||1 {{i|Glass Jar}}</br>16 {{i|Cochineal}}||N/A||100{{c}} | |{{i|Red Dye Blueprint}}||1 {{i|Glass Jar}}</br>16 {{i|Cochineal}}||N/A||100{{c}}||{{i|Red Dye}} | ||
|- | |- | ||
|{{ | |{{i|Red Picnic Blanket Blueprint}}||3 {{i|Red Cotton Fabric}}</br>3 {{i|White Cotton Fabric}}||1 {{i|Needle}}||2,250{{c}}||{{t|Red Picnic Blanket}} | ||
|- | |- | ||
|{{i|Red Rose Patch}}||12 {{i|Leaves}}</br>6 {{i|Red Rose}}||N/A||3,000{{c}} | |{{i|Red Rose Patch Blueprint}}||12 {{i|Leaves}}</br>6 {{i|Red Rose}}||N/A||3,000{{c}}||{{i|Red Rose Patch}} | ||
|- | |- | ||
|{{i|Round Table}}||6 {{i|Nail}}</br>2 {{i|Dark Hardwood}}</br>2 {{i|Light Hardwood}}</br>1 {{i|Bees Wax}}||N/A||1,500{{c}} | |{{i|Round Table Blueprint}}||6 {{i|Nail}}</br>2 {{i|Dark Hardwood}}</br>2 {{i|Light Hardwood}}</br>1 {{i|Bees Wax}}||N/A||1,500{{c}}||{{i|Round Table}} | ||
|- | |- | ||
|{{ | |{{i|Scattered Twigs Blueprint}}||10 {{i|Stick}}||N/A||250{{c}}||{{t|Scattered Twigs}} | ||
|- | |- | ||
|{{i|Signpost}}||6 {{i|Light Hardwood}}</br>6 {{i|Nail}}||1 {{i|Embers}}||1,500{{c}} | |{{i|Signpost Blueprint}}||6 {{i|Light Hardwood}}</br>6 {{i|Nail}}||1 {{i|Embers}}||1,500{{c}}||{{i|Signpost}} | ||
|- | |- | ||
|{{i|Silver Bar}}||5 {{i|Silver Ore}}||1 {{i|Embers}}||45{{c}} | |{{i|Silver Bar Blueprint}}||5 {{i|Silver Ore}}||1 {{i|Embers}}||45{{c}}||{{i|Silver Bar}} | ||
|- | |- | ||
|{{i|Cinder Spark}}||360 {{i|Embers}}||N/A||1,500{{c}} | |{{i|Cinder Spark Blueprint}}||360 {{i|Embers}}||N/A||1,500{{c}}||{{t|Cinder Spark}} | ||
|- | |- | ||
|{{i|Silver Decorative Fence}}||12 {{i|Stored Spring Water}}</br>12 {{i|Embers}}</br>6 {{i|Silver Bar}}||N/A||1,500{{c}} | |{{i|Silver Decorative Fence Blueprint}}||12 {{i|Stored Spring Water}}</br>12 {{i|Embers}}</br>6 {{i|Silver Bar}}||N/A||1,500{{c}}||{{i|Silver Decorative Fence}} | ||
|- | |- | ||
|{{i|Silver Long Decorative Fence}}||12 {{i|Stored Spring Water}}</br>12 {{i|Embers}}</br>9 {{i|Silver Bar}}||N/A||1,500{{c}} | |{{i|Silver Long Decorative Fence Blueprint}}||12 {{i|Stored Spring Water}}</br>12 {{i|Embers}}</br>9 {{i|Silver Bar}}||N/A||1,500{{c}}||{{i|Silver Long Decorative Fence}} | ||
|- | |- | ||
|{{i|Sol Incense}}||40 {{i|Cinnamon}}</br>30 {{i|Fennel}}||N/A||10,000{{c}} | |{{i|Sol Incense Blueprint}}||40 {{i|Cinnamon}}</br>30 {{i|Fennel}}||N/A||10,000{{c}}||{{i|Sol Incense}} | ||
|- | |- | ||
|{{i|Spare Wheel}}||3 {{i|Light Hardwood}}</br>1 {{i|Bees Wax}}||N/A||1,500{{c}} | |{{i|Spare Wheel Blueprint}}||3 {{i|Light Hardwood}}</br>1 {{i|Bees Wax}}||N/A||1,500{{c}}||{{i|Spare Wheel}} | ||
|- | |- | ||
|{{i|Square Table}}||8 {{i|Nail}}</br>5 {{i|Dark Hardwood}}</br>3 {{i|Light Hardwood}}</br>1 {{i|Bees Wax}}||N/A||1,500{{c}} | |{{i|Square Table Blueprint}}||8 {{i|Nail}}</br>5 {{i|Dark Hardwood}}</br>3 {{i|Light Hardwood}}</br>1 {{i|Bees Wax}}||N/A||1,500{{c}}||{{i|Square Table}} | ||
|- | |- | ||
|{{i|Stack Of Crates}}||3 {{i|Crate}}||N/A||175{{c}} | |{{i|Stack Of Crates Blueprint}}||3 {{i|Crate}}||N/A||175{{c}}||{{i|Stack Of Crates}} | ||
|- | |- | ||
|{{i|Starstruck Lens}}||2 {{i|Harkestone Fragment}}</br>9 {{i|Stardust}}</br>2 {{i|Platinum Nugget}}</br>2 {{i|Gold Nugget}}</br>2 {{i|Glass}}||N/A||7,500{{c}} | |{{i|Starstruck Lens Blueprint}}||2 {{i|Harkestone Fragment}}</br>9 {{i|Stardust}}</br>2 {{i|Platinum Nugget}}</br>2 {{i|Gold Nugget}}</br>2 {{i|Glass}}||N/A||7,500{{c}}||{{i|Starstruck Lens}} | ||
|- | |- | ||
|{{i|Steel Bar}}||1 {{i|Iron Bar}}||1 {{i|Embers}}||25{{c}} | |{{i|Steel Bar Blueprint}}||1 {{i|Iron Bar}}||1 {{i|Embers}}||25{{c}}||{{i|Steel Bar}} | ||
|- | |- | ||
|{{i|Tea Cup}}||3 {{i|Clay}}</br>1 {{i|Sand}}</br>1 {{i|Glaze}}</br>1 {{i|Gold Nugget}}||N/A||1,500{{c}} | |{{i|Tea Cup Blueprint}}||3 {{i|Clay}}</br>1 {{i|Sand}}</br>1 {{i|Glaze}}</br>1 {{i|Gold Nugget}}||N/A||1,500{{c}}||{{i|Tea Cup}} | ||
|- | |- | ||
|{{i|Tea Pot}}||6 {{i|Clay}}</br>2 {{i|Sand}}</br>2 {{i|Glaze}}</br>1 {{i|Gold Nugget}}||N/A||1,500{{c}} | |{{i|Tea Pot Blueprint}}||6 {{i|Clay}}</br>2 {{i|Sand}}</br>2 {{i|Glaze}}</br>1 {{i|Gold Nugget}}||N/A||1,500{{c}}||{{i|Tea Pot}} | ||
|- | |- | ||
|{{i|Teal Dye}}||1 {{i|Glass Jar}}</br>2 {{i|Shooting Starlet}}||N/A||100{{c}} | |{{i|Teal Dye Blueprint}}||1 {{i|Glass Jar}}</br>2 {{i|Shooting Starlet}}||N/A||100{{c}}||{{i|Teal Dye}} | ||
|- | |- | ||
|{{i|Tigerface Pattern Agate}}||1 {{i|Tiger Pattern Agate}}</br>100 {{i|Ash}}||N/A||500{{c}} | |{{i|Tigerface Pattern Agate Blueprint}}||1 {{i|Tiger Pattern Agate}}</br>100 {{i|Ash}}||N/A||500{{c}}||{{i|Tigerface Pattern Agate}} | ||
|- | |- | ||
|{{i|Unlit Lantern}}||24 {{i|Embers}}</br>6 {{i|Steel Bar}}</br>6 {{i|Glass}}</br>3 {{i|Bees Wax}}</br>3 {{i|Tallow}}</br>1 {{i|Twine}}||N/A||1,500{{c}} | |{{i|Unlit Lantern Blueprint}}||24 {{i|Embers}}</br>6 {{i|Steel Bar}}</br>6 {{i|Glass}}</br>3 {{i|Bees Wax}}</br>3 {{i|Tallow}}</br>1 {{i|Twine}}||N/A||1,500{{c}}||{{i|Unlit Lantern}} | ||
|- | |- | ||
|{{i|Valentine Pattern Agate}}||3 {{i|Harkestone}}</br>6 {{i|Precious Stones}}</br>6 {{i|Stardust}}</br>3 {{i|Platinum Bar}}</br>1 {{i|Red Rose}}||N/A||80,000{{c}} | |{{i|Valentine Pattern Agate Blueprint}}||3 {{i|Harkestone}}</br>6 {{i|Precious Stones}}</br>6 {{i|Stardust}}</br>3 {{i|Platinum Bar}}</br>1 {{i|Red Rose}}||N/A||80,000{{c}}||{{i|Valentine Pattern Agate}} | ||
|- | |- | ||
|{{i|Vibrant Eye Prism}}||1 {{i|Harkestone Fragment}}</br>1 {{i|Gold Nugget}}</br>2 {{i|Stardust}}</br>2 {{i|Glass}}||N/A||3,500{{c}} | |{{i|Vibrant Eye Prism Blueprint}}||1 {{i|Harkestone Fragment}}</br>1 {{i|Gold Nugget}}</br>2 {{i|Stardust}}</br>2 {{i|Glass}}||N/A||3,500{{c}}||{{i|Vibrant Eye Prism}} | ||
|- | |- | ||
|{{i|Violet Patch}}||3 {{i|Violet}}||N/A||2,250{{c}} | |{{i|Violet Patch Blueprint}}||3 {{i|Violet}}||N/A||2,250{{c}}||{{i|Violet Patch}} | ||
|- | |- | ||
|{{i|Watering Can}}||2 {{i|Stored Spring Water}}</br>2 {{i|Iron Ore}}||N/A||10{{c}} | |{{i|Watering Can Blueprint}}||2 {{i|Stored Spring Water}}</br>2 {{i|Iron Ore}}||N/A||10{{c}}||{{i|Watering Can}} | ||
|- | |- | ||
|{{i|White Cotton Fabric}}||5 {{i|Cotton}}</br>1 {{i|White Dye}}||N/A||25{{c}} | |{{i|White Cotton Fabric Blueprint}}||5 {{i|Cotton}}</br>1 {{i|White Dye}}||N/A||25{{c}}||{{i|White Cotton Fabric}} | ||
|- | |- | ||
|{{i|White Dye}}||1 {{i|Glass Jar}}</br>16 {{i|Bone}}||N/A||100{{c}} | |{{i|White Dye Blueprint}}||1 {{i|Glass Jar}}</br>16 {{i|Bone}}||N/A||100{{c}}||{{i|White Dye}} | ||
|- | |- | ||
|{{i|White Jute Anklets}}||1 {{i|White Cotton Fabric}}</br>6 {{i|Fibrous Plant}}</br>2 {{i|Clay}}||N/A||750{{c}} | |{{i|White Jute Anklets Blueprint}}||1 {{i|White Cotton Fabric}}</br>6 {{i|Fibrous Plant}}</br>2 {{i|Clay}}||N/A||750{{c}}||{{i|White Jute Anklets}} | ||
|- | |- | ||
|{{i|White Jute Bracelets}}||1 {{i|White Cotton Fabric}}</br>6 {{i|Fibrous Plant}}</br>2 {{i|Clay}}||N/A||750{{c}} | |{{i|White Jute Bracelets Blueprint}}||1 {{i|White Cotton Fabric}}</br>6 {{i|Fibrous Plant}}</br>2 {{i|Clay}}||N/A||750{{c}}||{{i|White Jute Bracelets}} | ||
|- | |- | ||
|{{i|White Jute Braided Tail}}||3 {{i|White Cotton Fabric}}</br>12 {{i|Fibrous Plant}}</br>6 {{i|Clay}}||N/A||750{{c}} | |{{i|White Jute Braided Tail Blueprint}}||3 {{i|White Cotton Fabric}}</br>12 {{i|Fibrous Plant}}</br>6 {{i|Clay}}||N/A||750{{c}}||{{i|White Jute Braided Tail}} | ||
|- | |- | ||
|{{i|White Jute Drape}}||2 {{i|White Cotton Fabric}}</br>12 {{i|Fibrous Plant}}</br>2 {{i|Clay}}||N/A||750{{c}} | |{{i|White Jute Drape Blueprint}}||2 {{i|White Cotton Fabric}}</br>12 {{i|Fibrous Plant}}</br>2 {{i|Clay}}||N/A||750{{c}}||{{i|White Jute Drape}} | ||
|- | |- | ||
|{{i|White Jute Earrings}}||1 {{i|White Cotton Fabric}}</br>2 {{i|Fibrous Plant}}</br>2 {{i|Clay}}||N/A||750{{c}} | |{{i|White Jute Earrings Blueprint}}||1 {{i|White Cotton Fabric}}</br>2 {{i|Fibrous Plant}}</br>2 {{i|Clay}}||N/A||750{{c}}||{{i|White Jute Earrings}} | ||
|- | |- | ||
|{{i|White Jute Firefly Chime}}||1 {{i|White Cotton Fabric}}</br>6 {{i|Fibrous Plant}}</br>3 {{i|Glass}}</br>3 {{i|Clay}}</br>1 {{i|Paper}}</br>1 {{i|Firefly}}||N/A||750{{c}} | |{{i|White Jute Firefly Chime Blueprint}}||1 {{i|White Cotton Fabric}}</br>6 {{i|Fibrous Plant}}</br>3 {{i|Glass}}</br>3 {{i|Clay}}</br>1 {{i|Paper}}</br>1 {{i|Firefly}}||N/A||750{{c}}||{{i|White Jute Firefly Chime}} | ||
|- | |- | ||
|{{i|White Jute Necklace}}||2 {{i|White Cotton Fabric}}</br>9 {{i|Fibrous Plant}}</br>2 {{i|Clay}}||N/A||750{{c}} | |{{i|White Jute Necklace Blueprint}}||2 {{i|White Cotton Fabric}}</br>9 {{i|Fibrous Plant}}</br>2 {{i|Clay}}||N/A||750{{c}}||{{i|White Jute Necklace}} | ||
|- | |- | ||
|{{i|White Jute Tail Tangle}}||2 {{i|White Cotton Fabric}}</br>9 {{i|Fibrous Plant}}</br>2 {{i|Clay}}||N/A||750{{c}} | |{{i|White Jute Tail Tangle Blueprint}}||2 {{i|White Cotton Fabric}}</br>9 {{i|Fibrous Plant}}</br>2 {{i|Clay}}||N/A||750{{c}}||{{i|White Jute Tail Tangle}} | ||
|- | |- | ||
|{{i|White Sweetheart Dress}}||9 {{i|White Cotton Fabric}}</br>6 {{i|Ribbon}}</br>6 {{i|Twine}}</br>1 {{i|Needle}}||N/A||1,000{{c}} | |{{i|White Sweetheart Dress Blueprint}}||9 {{i|White Cotton Fabric}}</br>6 {{i|Ribbon}}</br>6 {{i|Twine}}</br>1 {{i|Needle}}||N/A||1,000{{c}}||{{i|White Sweetheart Dress}} | ||
|- | |- | ||
|{{i|White Sweetheart Headscarf}}||2 {{i|White Cotton Fabric}}</br>3 {{i|Ribbon}}</br>1 {{i|Needle}}||N/A||1,000{{c}} | |{{i|White Sweetheart Headscarf Blueprint}}||2 {{i|White Cotton Fabric}}</br>3 {{i|Ribbon}}</br>1 {{i|Needle}}||N/A||1,000{{c}}||{{i|White Sweetheart Headscarf}} | ||
|- | |- | ||
|{{i|White Sweetheart Ribbon}}||1 {{i|White Cotton Fabric}}</br>1 {{i|Ribbon}}</br>1 {{i|Needle}}||N/A||1,000{{c}} | |{{i|White Sweetheart Ribbon Blueprint}}||1 {{i|White Cotton Fabric}}</br>1 {{i|Ribbon}}</br>1 {{i|Needle}}||N/A||1,000{{c}}||{{i|White Sweetheart Ribbon}} | ||
|- | |- | ||
|{{i|White Sweetheart Sun Hat}}||12 {{i|Stick}}</br>1 {{i|White Cotton Fabric}}</br>2 {{i|Ribbon}}</br>1 {{i|Needle}}||N/A||1,000{{c}} | |{{i|White Sweetheart Sun Hat Blueprint}}||12 {{i|Stick}}</br>1 {{i|White Cotton Fabric}}</br>2 {{i|Ribbon}}</br>1 {{i|Needle}}||N/A||1,000{{c}}||{{i|White Sweetheart Sun Hat}} | ||
|- | |- | ||
|{{i|White Sweetheart Tail Ribbon}}||1 {{i|White Cotton Fabric}}</br>2 {{i|Ribbon}}</br>1 {{i|Needle}}||N/A||1,000{{c}} | |{{i|White Sweetheart Tail Ribbon Blueprint}}||1 {{i|White Cotton Fabric}}</br>2 {{i|Ribbon}}</br>1 {{i|Needle}}||N/A||1,000{{c}}||{{i|White Sweetheart Tail Ribbon}} | ||
|- | |- | ||
|{{i|White Sweetheart Tights}}||3 {{i|White Cotton Fabric}}</br>3 {{i|Ribbon}}</br>3 {{i|Twine}}</br>1 {{i|Needle}}||N/A||1,000{{c}} | |{{i|White Sweetheart Tights Blueprint}}||3 {{i|White Cotton Fabric}}</br>3 {{i|Ribbon}}</br>3 {{i|Twine}}</br>1 {{i|Needle}}||N/A||1,000{{c}}||{{i|White Sweetheart Tights}} | ||
|- | |- | ||
|{{i|White Sweetheart Wrist Ribbon}}||1 {{i|White Cotton Fabric}}</br>1 {{i|Ribbon}}</br>1 {{i|Needle}}||N/A||1,000{{c}} | |{{i|White Sweetheart Wrist Ribbon Blueprint}}||1 {{i|White Cotton Fabric}}</br>1 {{i|Ribbon}}</br>1 {{i|Needle}}||N/A||1,000{{c}}||{{i|White Sweetheart Wrist Ribbon}} | ||
|- | |- | ||
|{{i|White Wool Fabric}}||3 {{i|Wool}}</br>1 {{i|White Dye}}||N/A||25{{c}} | |{{i|White Wool Fabric Blueprint}}||3 {{i|Wool}}</br>1 {{i|White Dye}}||N/A||25{{c}}||{{i|White Wool Fabric}} | ||
|- | |- | ||
|{{i|White Woolen Cap}}||3 {{i|White Wool Fabric}}</br>6 {{i|Twine}}</br>1 {{i|Clay}}</br>1 {{i|Needle}}||N/A||1,500{{c}} | |{{i|White Woolen Cap Blueprint}}||3 {{i|White Wool Fabric}}</br>6 {{i|Twine}}</br>1 {{i|Clay}}</br>1 {{i|Needle}}||N/A||1,500{{c}}||{{i|White Woolen Cap}} | ||
|- | |- | ||
|{{i|White Woolen Gloves}}||2 {{i|White Wool Fabric}}</br>2 {{i|Leather}}</br>2 {{i|Twine}}</br>1 {{i|Needle}}||N/A||1,500{{c}} | |{{i|White Woolen Gloves Blueprint}}||2 {{i|White Wool Fabric}}</br>2 {{i|Leather}}</br>2 {{i|Twine}}</br>1 {{i|Needle}}||N/A||1,500{{c}}||{{i|White Woolen Gloves}} | ||
|- | |- | ||
|{{i|White Woolen Pants}}||6 {{i|White Wool Fabric}}</br>6 {{i|Twine}}</br>2 {{i|Ribbon}}</br>1 {{i|Clay}}</br>1 {{i|Needle}}||N/A||1,500{{c}} | |{{i|White Woolen Pants Blueprint}}||6 {{i|White Wool Fabric}}</br>6 {{i|Twine}}</br>2 {{i|Ribbon}}</br>1 {{i|Clay}}</br>1 {{i|Needle}}||N/A||1,500{{c}}||{{i|White Woolen Pants}} | ||
|- | |- | ||
|{{i|White Woolen Scarf}}||3 {{i|White Wool Fabric}}</br>6 {{i|Twine}}</br>1 {{i|Needle}}||N/A||1,500{{c}} | |{{i|White Woolen Scarf Blueprint}}||3 {{i|White Wool Fabric}}</br>6 {{i|Twine}}</br>1 {{i|Needle}}||N/A||1,500{{c}}||{{i|White Woolen Scarf}} | ||
|- | |- | ||
|{{i|White Woolen Sweater}}||9 {{i|White Wool Fabric}}</br>9 {{i|Twine}}</br>3 {{i|Clay}}</br>1 {{i|Needle}}||N/A||1,500{{c}} | |{{i|White Woolen Sweater Blueprint}}||9 {{i|White Wool Fabric}}</br>9 {{i|Twine}}</br>3 {{i|Clay}}</br>1 {{i|Needle}}||N/A||1,500{{c}}||{{i|White Woolen Sweater}} | ||
|- | |- | ||
|{{i|White Woolen Tail Cozy}}||3 {{i|White Wool Fabric}}</br>3 {{i|Twine}}</br>1 {{i|Needle}}||N/A||1,500{{c}} | |{{i|White Woolen Tail Cozy Blueprint}}||3 {{i|White Wool Fabric}}</br>3 {{i|Twine}}</br>1 {{i|Needle}}||N/A||1,500{{c}}||{{i|White Woolen Tail Cozy}} | ||
|- | |- | ||
|{{i|White Woolen Work Boots}}||6 {{i|Leather}}</br>2 {{i|Glue}}</br>1 {{i|White Wool Fabric}}</br>6 {{i|Twine}}</br>1 {{i|Needle}}||N/A||1,500{{c}} | |{{i|White Woolen Work Boots Blueprint}}||6 {{i|Leather}}</br>2 {{i|Glue}}</br>1 {{i|White Wool Fabric}}</br>6 {{i|Twine}}</br>1 {{i|Needle}}||N/A||1,500{{c}}||{{i|White Woolen Work Boots}} | ||
|- | |- | ||
|{{i|Yellow Dye}}||1 {{i|Glass Jar}}</br>16 {{i|Dandelion}}||N/A||100{{c}} | |{{i|Yellow Dye Blueprint}}||1 {{i|Glass Jar}}</br>16 {{i|Dandelion}}||N/A||100{{c}}||{{i|Yellow Dye}} | ||
|- | |- | ||
|{{i|Zenith Incense}}||30 {{i|Rosemary}}</br>30 {{i|Sage}}||N/A||10,000{{c}} | |{{i|Zenith Incense Blueprint}}||30 {{i|Rosemary}}</br>30 {{i|Sage}}||N/A||10,000{{c}}||{{i|Zenith Incense}} | ||
|} | |} | ||
Latest revision as of 17:26, 15 September 2026
″Well if it isn't the devil. Hello, stranger! I'm Furze, and I run this workshop. I grew up right here in Cogwheel, and I founded this building to give curious catfolk an opportunity to fiddle with their paws. Hard work and initiative is what makes the craftscat, hoo hoo!″—Furze

Furze is a Cogwheel Wolf NPC found in the Crafting page, allowing the player to use her workshop for a fee.
Dyeing Items

Dyeing takes a selected item and changes its color the selected dye color. The dye is consumed upon use. The menu is accessed by selecting "Dye Items" underneath Winnipeg. Only Accessories and Fabrics can be dyed by Furze.
Crafting
Crafting is a method of creating new items (minus foods) with Blueprints. Blueprints are formula items with instructions to craft 1 item. They can be used an infinite number of times when added. To add a blueprint select "Add Blueprints" underneath Furze's dialogue. Any blueprints that are available and have yet to be applied will be present. Blueprints can be returned to storage by selecting the  Formula symbol underneath its icon, after a blueprint has returned to storage it'll no longer be available in Furze's list.
Every blueprint requires a copper  , and occasionally an additional "Items Required" to create. These are separate from the main blueprint, and are planned to be replaced with tools that aren't single-use.[1] Crafting is an instant process, and will consume all inputted items.

Above is an example of a crafting recipe. The leftmost side contains the name, and icon of the item the blueprint will create. At the center is the blueprints parts, items required, and what nature likes the item. "Add Parts" is currently a non-functional feature. The rightmost side has the copper fee and a menu to select how many of the item to craft. See below for a list of all crafting recipes.
List of Blueprints


Gallery
-
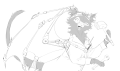
Furze colorless sketch
-

Furze with flat colors


History
- Crafting fees were reduced on April 21st, 2026.[2]
Trivia
- Furze was first mentioned by name in the PawBorough Discord server on August 14th, 2024.
- Just two weeks later, a refined sketch of her NPC art was revealed on August 28th, 2024.